Introduction:
Installing AVRA in a unix environment is pretty easy. Using a package manager it can be downloaded and installed from a repository with relative ease. But what if you are one of the many people out there using a Mickeysoft operating system. In that case your options are limited. A quick web search turned up an installer for AVRA version 1.2.3 however this is not the latest version (AVRA hasn't been updated since 2010) and I've seen reports that the installer may have adverse effects on your PATH system variable. Luckily the process of setting up AVRA on a windows platform isn't all that hard if your willing to put in a little time and effort.
For those who do not want to go through the hassle of compiling from source, you can download the compiled avra assembler from here avra.zip. It was created from source in Dec. 2014 and is what I'm using on my XP box. It is known to work on Windows 7, 64-bit but have not tried it on any other platform. If you do try it on another system and it works, drop me a line. I would be interested to know.
Dev-C++
I'm a big fan of SourceForge and open source software. One of the many projects there is Dev-C++. A quite capable C/C++ compiler that we can use to compile the AVRA source to a usable program. First, you will need to visit the site and download the latest version. It has a windows installer so installation is pretty straight-forward. Just start the setup and follow the installation screen until completion. It doesn't take very long.


AVRA Source
The next thing you will need is the source code for AVRA. Currently it is at version 1.3 and is also one of the many projects hosted at SourceForge. Since a windows version is not available, what you are going to get is a b-zipped tarball (avra-1.3.0.tar.bz2). That's ok, this has the source code we are looking for. Download the file to your machine, preferably somewhere you can find it again.
Extracting Source Files
Once downloaded, you are going to have to extract the source files. Windows won't touch this file so you will need WinRAR or in my case 7-Zip. If you don't have 7-Zip, guess where you can find it. Using 7-Zip, open the avra-1.3.0.tar.bz2 archive.


Creating the Project
Open up Dev-C++ and create a new project. When you do, make sure that you choose a Console Application and that you specify that it is a 'C' project. You can call the project whatever you like but 'avra' seemed appropriate.

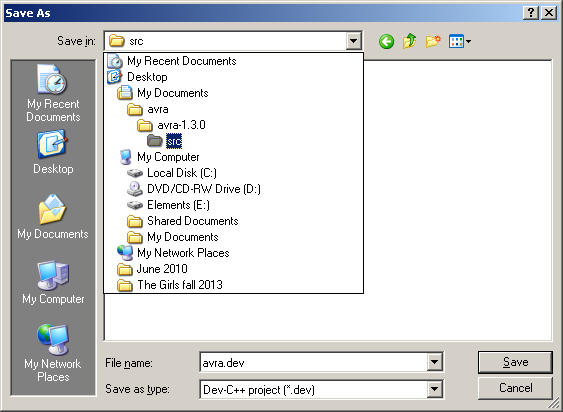
Next it will ask you where the project will live. Just point it toward the My Documents\avra-1.3.0\src directory. You don't have to put it there but I like to keep things fairly clean when I can (Yeah, I have an extra avra directory in there. Just point it toward the src directory).
When the project is created, Dev-C++ creates a main.c for you. That needs to be removed. Close the file out of the editor and right-click the file name in the project tree and then delete it. AVRA has it's own main function and we don't need it getting confused.

Next, add all the source and header files to the project.

Select all the files in the source directory with a .c and .h extension.

Once selected, the project tree should look like the following...

Compiling
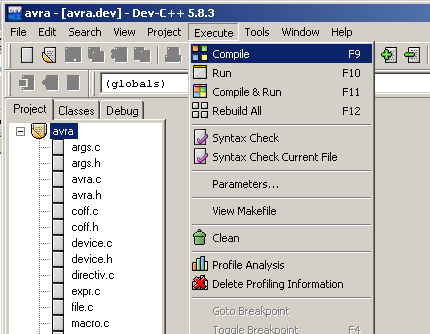
Creating the executable isn't hard at all. Go to the menu and select Execute->Compile, or press F9.
It will take a moment but unless something goes horribly wrong, you should see a successfully compiled message in the information panel.

Go to your project folder and you should find avra.exe. That's all there is to compiling avra from source.

Installing
Create a new directory in 'C:\Program Files' called avra. The total path should be 'C:\Program Files\avra'. Copy the executable you created in the previous step to this directory. You may also want to copy the 'includes' directory from the original source tarball to this directory as well, although avra doesn't assemble the include files in that folder correctly (we'll get to that later).

Modifying the PATH Environment Variable
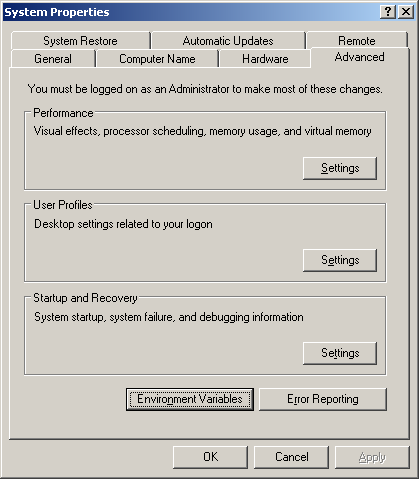
Avra will run like this if you don't mind referencing 'C:\Program Files\avra\avra.exe' all the time. I'd rather have it run by simple typing avra so it's time to update the environment PATH. Open Control Panel->System, and then go to the Advanced tab. Click 'Environment Variables'.
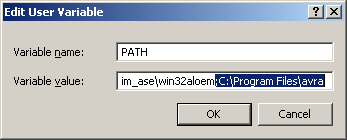
Highlight the PATH variable and click edit.

When the dialog comes up the entire PATH variable will be high-lighted. DO NOT erase it by hitting the space-bar or some other character. Click somewhere inside the edit control or better yet just hit the right arrow key and add ';C:\Program Files\avra' to the end of the string. Notice the semi-colon before the new directory you are adding. That needs to be there to separate this path from all the other paths the operating system will search. When done, hit OK. If you have made a mistake or inadvertently erased the PATH string just hit Cancel and try again.
At this point you should be all set to start using your assembler. Open a command prompt and type in avra. You should be greeted with avra's usage text.
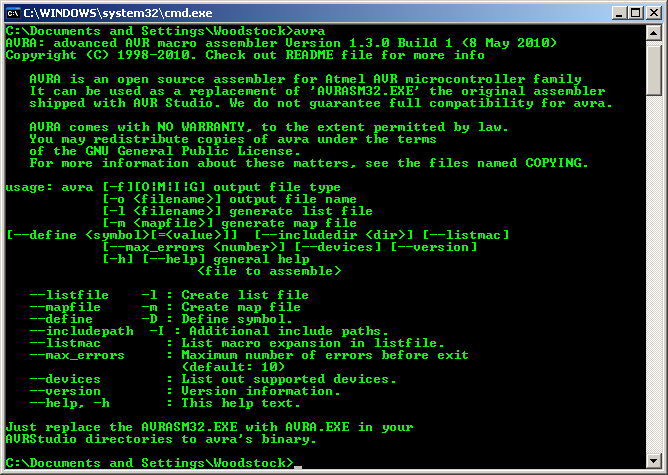
Good luck and happy assembling.
No comments:
Post a Comment