Monday, December 8, 2014

ATMega328 - USART Interrupts

Intro:

Creating interrupt service routines using assembly isn't as hard as people think. With the exception of the initial setup it is really no different than writing any other code and has the added benefit of allowing the processor to work on it's main task instead of, for example, waiting around to send/receive the next character over the serial interface. There is a little setup to get the processor to execute an interrupt routine, but once you understand how they work it's actually quite simple.

The Code

The code is written for an ATMega328, the same chip used on the current Arduino Uno. The code is compiled using avra assembler and loaded to an Uno using avrdude. Once the code is loaded, open the serial monitor from the Arduino IDE and try it out.


;
;serialint.asm
;
;USART implementation using interrupts.
;

.device atmega328p

.equ UDR0 = 0xc6      ;USART Data Register
.equ UBRR0L = 0xc4    ;USART Baud Rate Register Low
.equ UBRR0H = 0xc5    ;USART Baud Rate Register High
.equ UCSR0A = 0xc0    ;USART Control and Status Register A
.equ UCSR0B = 0xc1    ;USART Control and Status Register B
.equ UCSR0C = 0xc2    ;USART Control and Status Register C
.equ UDRE0 = 5

;Again, interrupt vectors for the 328p are different than
;48 or 88 device. This is the second time this has bitten me.

;Reset Vector
.org 0x0000
  jmp Main

;USART Receive Interrupt Vector
.org 0x0024
  jmp Rx_ISR

;USART Transmit Interrupt Vector
.org 0x0028
  jmp Tx_ISR

.org 0x0040
Main:
  ;Disable interrupts while doing setup
  cli

  ;Set up USART
  call SerialInit

  ;Allow interrupts
  sei

  ;Point Z-Register to our message and send.
  ;Address of message is shifted left one bit since data in
  ;program space is stored 16-bits wide. The LSB of the Z
  ;register is used to distinguish between the upper or lower
  ;byte.
  ldi r30, low(message<<1)
  ldi r31, high(message<<1)
  call TxEnable

;Wait here until the end of time.
loop:
  rjmp loop

;
;SerialInit - Initialize the USART
;
SerialInit:
  ;Set BAUD rate to 9600 (assuming a 16MHz system clock)
  clr r17
  sts UBRR0H, r17
  ldi r16, 0x67
  sts UBRR0L, r16

  ;Enable transmitter and receiver.
  ;Enable interrupts for USART Receive.
  ldi r16, 0x98
  sts UCSR0B, r16

  ;Not going to do anything with UCSR0C since the default
  ;values will give the 8:N:1 format needed to communicate
  ;with the serial monitor of the Arduino IDE.

  ret

TxEnable:
  ;Enable the transmit interrupt allowing the ISR to
  ;push the string out over the serial interface.
  push r17
  lds r17,UCSR0B
  ori r17,0x40
  sts UCSR0B, r17

  ;Send first character. Interrupt routine will take
  ;care of the rest.
  lpm r17, Z+
  sts UDR0,r17

  pop r17

  ret

;
;Rx_ISR - Interrupt routine to deal with any incoming data
;
Rx_ISR:
  ;Read the data register, and send it back.
  lds r16,UDR0
  sts UDR0, r16

  reti

;
;Tx_ISR - Interrupt routine to load next byte to send
;
Tx_ISR:
  push r17

  lpm r17,Z+
  tst r17
  breq Tx_Done
  sts UDR0,r17
  pop r17
  reti
Tx_Done:
  ;Turn off transmit interrupts.
  lds r17, UCSR0B
  andi r17, 0xBF
  sts UCSR0B, r17

  pop r17

  reti

;Program data
message: .db "Using USART with interrupts.",0x0c,0x0a,0x00

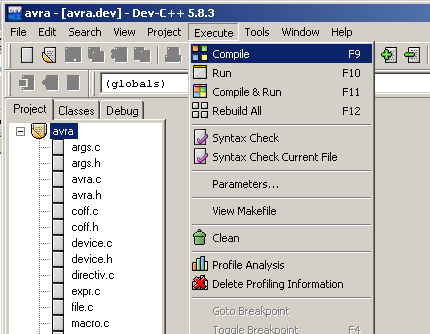
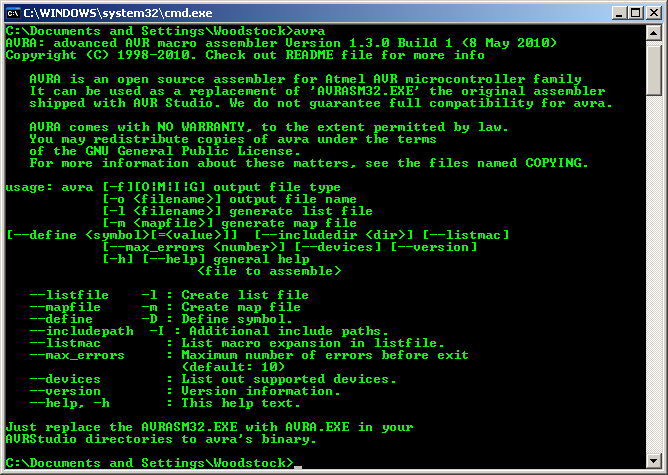
Save the code to a file called serialint.asm. To assemble, open a terminal window, change to the directory of the file and issue the command:

avra serialint.asm

Once compiled, transfer the hex file using avrdude with the following command:

avrdude -patmega328p -carduino -P/dev/ttyACM0 -b115200 -Uflash:w:"serialint.hex":i

The serial port on my system is ttyACM0, yours may be different.

Now open the Arduino IDE and go to the Serial Monitor. As long as it's set for 9600 baud you should see the following...

The interrupt vector table begins at location 0x0000, which is the RESET vector. The main program starts at location 0x0040 which is the next location after the interrupt vector table. A complete list of vectors can be found in the atmega328p datasheet. Just insert a jump instruction to your service routine and enable the particular interrupt to use it. You will also need to enable the global interrupt flag. Don't forget that. None of the interrupts will execute without it.

Friday, December 5, 2014

AVRA Assembler Under Windows

Introduction:

Installing AVRA in a unix environment is pretty easy. Using a package manager it can be downloaded and installed from a repository with relative ease. But what if you are one of the many people out there using a Mickeysoft operating system. In that case your options are limited. A quick web search turned up an installer for AVRA version 1.2.3 however this is not the latest version (AVRA hasn't been updated since 2010) and I've seen reports that the installer may have adverse effects on your PATH system variable. Luckily the process of setting up AVRA on a windows platform isn't all that hard if your willing to put in a little time and effort.

For those who do not want to go through the hassle of compiling from source, you can download the compiled avra assembler from here avra.zip. It was created from source in Dec. 2014 and is what I'm using on my XP box. It is known to work on Windows 7, 64-bit but have not tried it on any other platform. If you do try it on another system and it works, drop me a line. I would be interested to know.

Dev-C++

I'm a big fan of SourceForge and open source software. One of the many projects there is Dev-C++. A quite capable C/C++ compiler that we can use to compile the AVRA source to a usable program. First, you will need to visit the site and download the latest version. It has a windows installer so installation is pretty straight-forward. Just start the setup and follow the installation screen until completion. It doesn't take very long.

AVRA Source

The next thing you will need is the source code for AVRA. Currently it is at version 1.3 and is also one of the many projects hosted at SourceForge. Since a windows version is not available, what you are going to get is a b-zipped tarball (avra-1.3.0.tar.bz2). That's ok, this has the source code we are looking for. Download the file to your machine, preferably somewhere you can find it again.

Extracting Source Files

Once downloaded, you are going to have to extract the source files. Windows won't touch this file so you will need WinRAR or in my case 7-Zip. If you don't have 7-Zip, guess where you can find it. Using 7-Zip, open the avra-1.3.0.tar.bz2 archive.

And then open the tarball.
From here you can drag-and-drop the avra-1.3.0 folder to 'My Documents'.

Creating the Project

Open up Dev-C++ and create a new project. When you do, make sure that you choose a Console Application and that you specify that it is a 'C' project. You can call the project whatever you like but 'avra' seemed appropriate.

Next it will ask you where the project will live. Just point it toward the My Documents\avra-1.3.0\src directory. You don't have to put it there but I like to keep things fairly clean when I can (Yeah, I have an extra avra directory in there. Just point it toward the src directory).

When the project is created, Dev-C++ creates a main.c for you. That needs to be removed. Close the file out of the editor and right-click the file name in the project tree and then delete it. AVRA has it's own main function and we don't need it getting confused.

Next, add all the source and header files to the project.

Select all the files in the source directory with a .c and .h extension.

Once selected, the project tree should look like the following...

Compiling

Creating the executable isn't hard at all. Go to the menu and select Execute->Compile, or press F9.

It will take a moment but unless something goes horribly wrong, you should see a successfully compiled message in the information panel.

Go to your project folder and you should find avra.exe. That's all there is to compiling avra from source.

Installing

Create a new directory in 'C:\Program Files' called avra. The total path should be 'C:\Program Files\avra'. Copy the executable you created in the previous step to this directory. You may also want to copy the 'includes' directory from the original source tarball to this directory as well, although avra doesn't assemble the include files in that folder correctly (we'll get to that later).

Modifying the PATH Environment Variable

Avra will run like this if you don't mind referencing 'C:\Program Files\avra\avra.exe' all the time. I'd rather have it run by simple typing avra so it's time to update the environment PATH. Open Control Panel->System, and then go to the Advanced tab. Click 'Environment Variables'.

Highlight the PATH variable and click edit.

When the dialog comes up the entire PATH variable will be high-lighted. DO NOT erase it by hitting the space-bar or some other character. Click somewhere inside the edit control or better yet just hit the right arrow key and add ';C:\Program Files\avra' to the end of the string. Notice the semi-colon before the new directory you are adding. That needs to be there to separate this path from all the other paths the operating system will search. When done, hit OK. If you have made a mistake or inadvertently erased the PATH string just hit Cancel and try again.

At this point you should be all set to start using your assembler. Open a command prompt and type in avra. You should be greeted with avra's usage text.

Good luck and happy assembling.

Tuesday, December 2, 2014

Starting Assembly With AVRA

Introduction

The Arduino platform is very popular. The UNO in particular has made qute a splash. I have been using them myself for quite some time. The IDE is easy to set up and use, and anyone who has any experience with C/C++ can get a working sketch up and running without too much fuss. For anyone who wants to get into the realm of programming microcontrollers this would be an excellent place to start.

I however, am old-school. When it comes to microcontrollers I still prefer assembly and I like knowing what's working behind the scenes and how to extract as much horsepower out of that little slab of silicon as I can. Either that or I just like to torture myself, you decide.

I've searched the internet for sites related to assembly on the AVR devices and have noticed that there isn't much out there. Not a lot of information or assemblers for that matter. Atmel's studio which I have not used for quite some time is quite capable of creating an assembly program but is geared much more tword C/C++.

There's also GNU's avr-as which comes as part of the Arduino IDE. This I have used but requires the extra step of extracing your program from an .elf file after compiling.

After a while I stumbled upon AVRA. This as it turns out was exactly what I was looking for. Take assembly mneumonics and convert them to machine code. Don't try to anticipate what I want, just do what I tell you (old-school remember?).

Installing AVRA

I use Ubuntu 14.04. Installing avra is pretty simple since it's already part of the Ubuntu repository. To install the assembler on your system, use the Synaptic Package Manager and do a search for avra. Mark avra for installation and Apply. AVRA is a command line assembler, so if your looking for an IDE you won't find one.

Invoking the assembler

To run the compiler you first need to open a command terminal. If your using Ubuntu, Ctrl-Alt-T will do the trick otherwise you can use Terminal or LXTerminal from the desktop menu. From within the terminal window type 'avra' (without the quotes) and you should be greeted with a brief explanation of the different command line options available.

If everything has been successful to this point then it's time to write and compile your first assembly program for an AVR microcontroller. We'll be using the Arduino Uno which has an atmega328p device and hopefully you have the Arduino IDE installed as well because we will be using 'avrdude' to upload our program to the device.

The Beginning - Blink.asm

Experience with every hardware platform starts the same way. Can we get the tool-chain to work? So in true 'Hello World' fashion we are going to get the on-board LED connected to pin #13 to flash and hopefully get you comfortable with assembling and transfering programs to the device.

Using your favorite text editor, enter the following code. I use Atom but gedit or any other editor that saves files in plain text will do. Save the file as 'blink.asm'.


          .device atmega328p

          .equ RAMEND = 0x8ff   ;End of user RAM
          .equ SREG = 0x3f      ;Status Register
          .equ SPL = 0x3d       ;Stack Pointer Low
          .equ SPH = 0x3e       ;Stack Pointer High
          .equ PORTB = 0x05     ;Port B
          .equ DDRB = 0x04      ;Data Direction Register Port B

          ;Reset Vector
          .org 0x0000
             rjmp main

          ;Main Program Start
          .org 0x003a
          main:
             ldi r16,0            ;reset system status
             out SREG,r16         ;init stack pointer
             ldi r16,low(RAMEND)  ;0xff
             out SPL,r16
             ldi r16,high(RAMEND) ;0x08
             out SPH,r16

             ldi r16,0x20         ;set port PB5 to output mode
             out DDRB,r16

             clr r17
          mainloop:
             eor r17,r16          ;invert output bit
             out PORTB,r17        ;write to port
             call wait            ;wait some time
             rjmp mainloop        ;loop forever

          wait:
             push r16
             push r17
             push r18

             ldi r16,0x20         ;loop 0x400000 times
             ldi r17,0x00         ;~12 million cycles
             ldi r18,0x00         ;~0.7s at 16Mhz
          w0:
             dec r18
             brne w0
             dec r17
             brne w0
             dec r16
             brne w0

             pop r18
             pop r17
             pop r16
             ret
        

Now that you have the source file, go to the terminal window and change the directory to the folder where you saved your file. For me it's under ~/Documents/assembly/blink. For you I'm sure it will be different. Once there enter the following command:

avra blink.asm

If everything goes ok, which it should, you will see something like the following...

Issue the ls -l command and you'll notice that avra generated four other files from your one blink.asm. The one we are interested in is blink.hex. This is the one we are going to send to the Arduino Uno using avrdude. If you open the hex file in your text editor you'll see there really isn't that much there. It's just a series of hexadecimal numbers that will be loaded into the device's program memory by the bootloader. In fact, lets do that.

First off, you need to know where the serial port to the Arduino is. On my system it is at

/dev/ttyACM0

If your not sure, issue this command at the command prompt -> dmesg | grep tty. This will list all the serial ports on your system. If your not sure which one it is, run the command with the Arduino plugged in and one where it is not. The missing port will be the one your looking for.

So finally, lets get the program into the device.

avrdude -patmega328p -carduino -P/dev/ttyACM0 -b115200 -Uflash:w:"blink.hex":i

A little explanation of the options:

            -p The AVR device. The Uno has an atmega328p
            -c The programmer type. In this case it's an arduino
            -P Specify the port. /dev/ttyACM0 here, yours might be different
            -b Baud rate
            -U The memory type, file and format to use.
               We will be writing to flash memory using blink.hex
               which is in intel hex format.
            

Once finished, the device will reset and you should have an LED blinking away on your Arduino Uno.